Configurator
The Configurator is where you set up the server-side settings: database connection, web certificate, Windows
services and logging. It opens automatically at the end of the installation. To open it later, run
C:\Program Files\Nascella\VpnReporter\Configurator\Nascella.Vpn.Configurator.exe as administrator.
Opening the Configurator
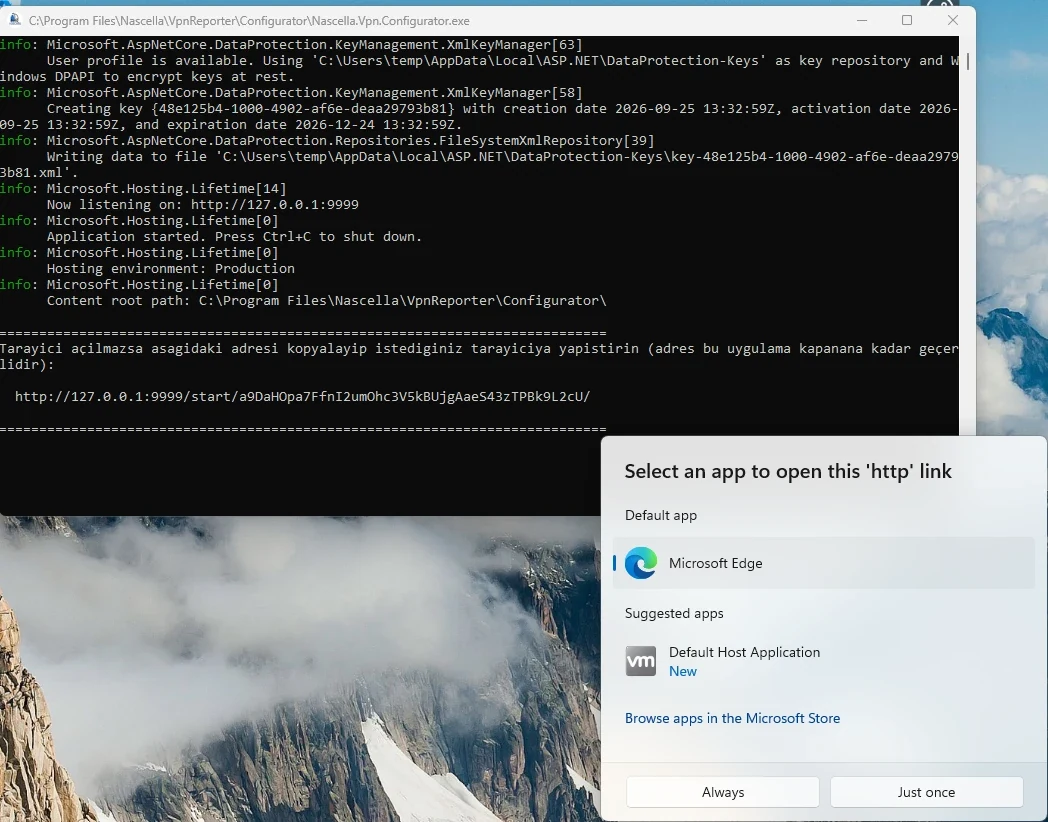
The Configurator opens a console window and starts a web interface on port 9999 that is reachable only from the server itself. The interface opens in your browser automatically; if Windows asks which app to use, choose your browser.
If the browser does not open, copy the address shown in the console window (http://127.0.0.1:9999/start/...) and
paste it into a browser on the server. The address is valid until the Configurator is closed.
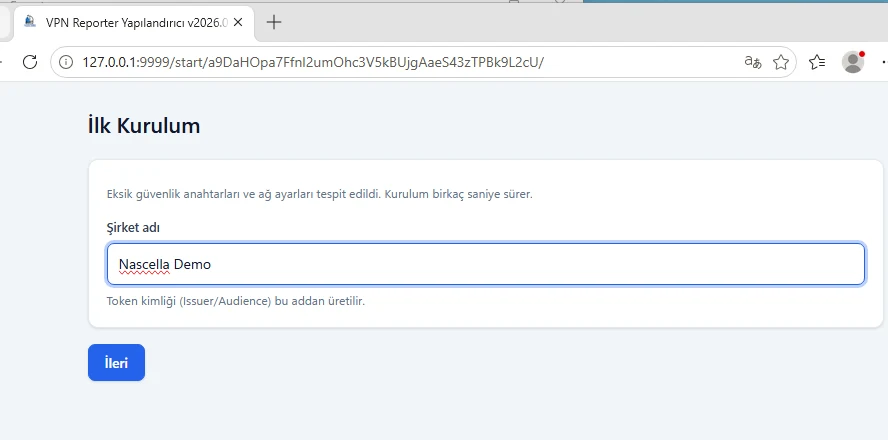
1. First-time setup
On the first start, the Configurator detects the missing security keys and network settings and opens the first-time setup screen. Enter the Company name and click Next. The token identity (Issuer/Audience) is generated from this name.
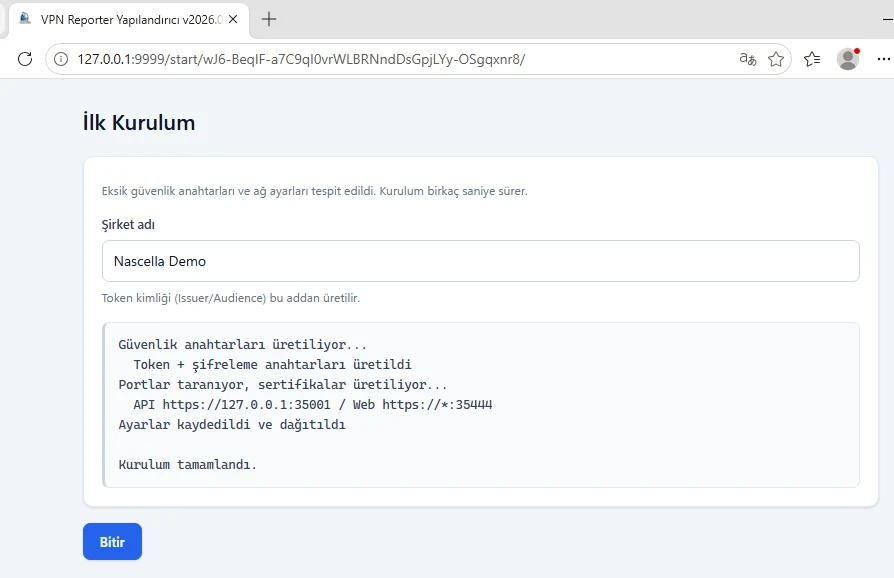
Security keys and certificates are generated, ports are assigned and the settings are saved. Click Finish.
| Component | Default address |
|---|---|
| API | https://127.0.0.1:35001 (only from inside the server) |
| Web console | https://*:35444 |
2. Database
After the first-time setup, the Database Settings screen opens.
Change the Configurator's language with the Language button at the bottom left.
- Select the Provider: MSSQL, MySQL, PostgreSQL or SQLite.
- Enter the server, port, database name, user name and password.
- Click Test Connection. Settings can only be saved after a successful test.
- If the server is reachable but the database does not exist yet, you are asked whether to create it. Click Yes.
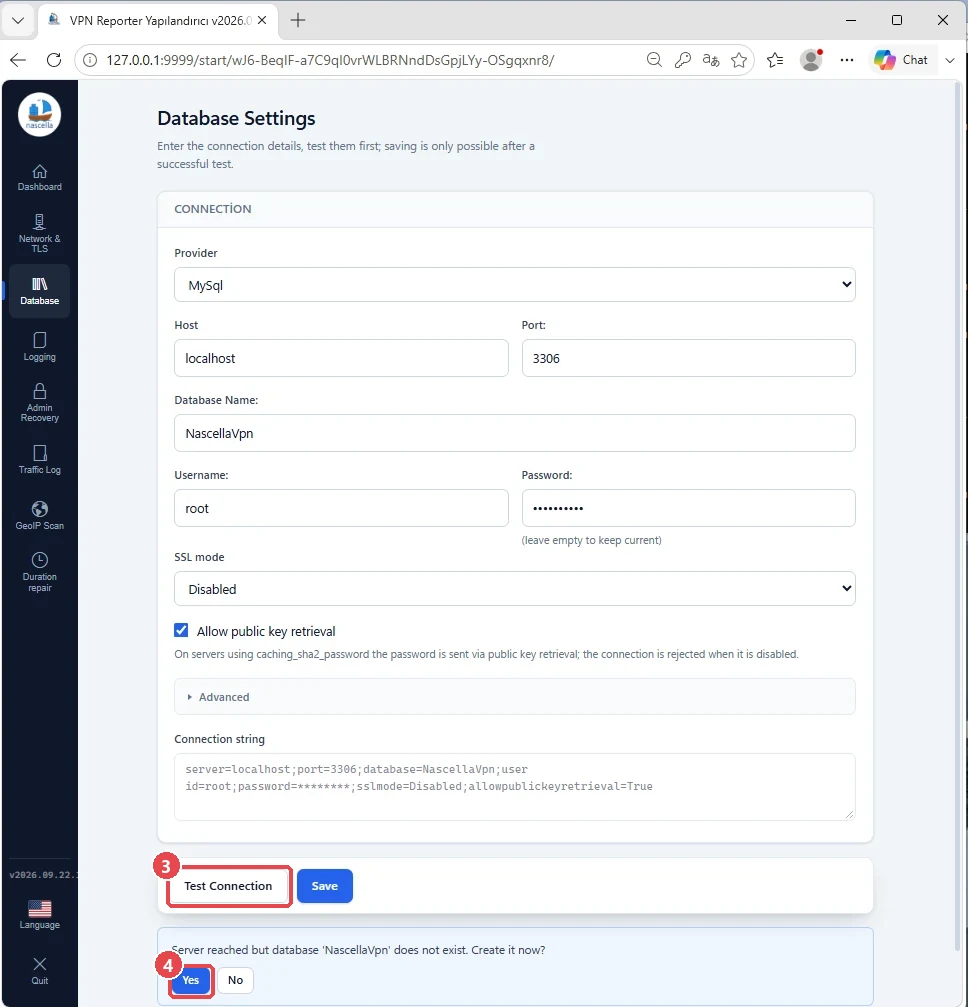
- The database is created and the connection is tested again. When you see Connection successful, click Save.

- The settings are written to the
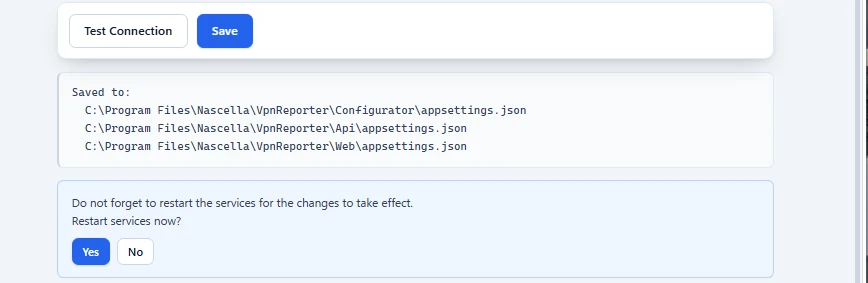
appsettings.jsonfiles in the Configurator, Api and Web folders, and you are asked whether to restart the services.- Yes: the services restart and VPN Reporter is ready to use with the default settings.
- No: choose this if you want to replace the web certificate, then continue with Network and TLS.
3. Network and TLS
The installation creates a self-signed certificate for the web console, so browsers show a warning. We recommend replacing the web server certificate with your own. The API certificate does not need to be changed.
Sections of the Network & TLS screen:
| Section | Description |
|---|---|
| API Server | Port (default 35001) and certificate. The API address is fixed: it is reachable only from inside the server (127.0.0.1). |
| Web Server | IP address (* = all addresses), port (default 35444) and certificate. The certificate name (CN), file, expiry date and days left are shown. |
| CORS - Allowed Origins | Addresses used to reach the web console; one per line (commas also work). Updated automatically when the web port changes. |
| WorkerAPI | Ignore SSL certificate errors: applies to the collector's connection to the API. Enabled by default because the API uses a self-signed certificate; turn it off if you installed a trusted (corporate) certificate for the API. |
To replace the web certificate:
-
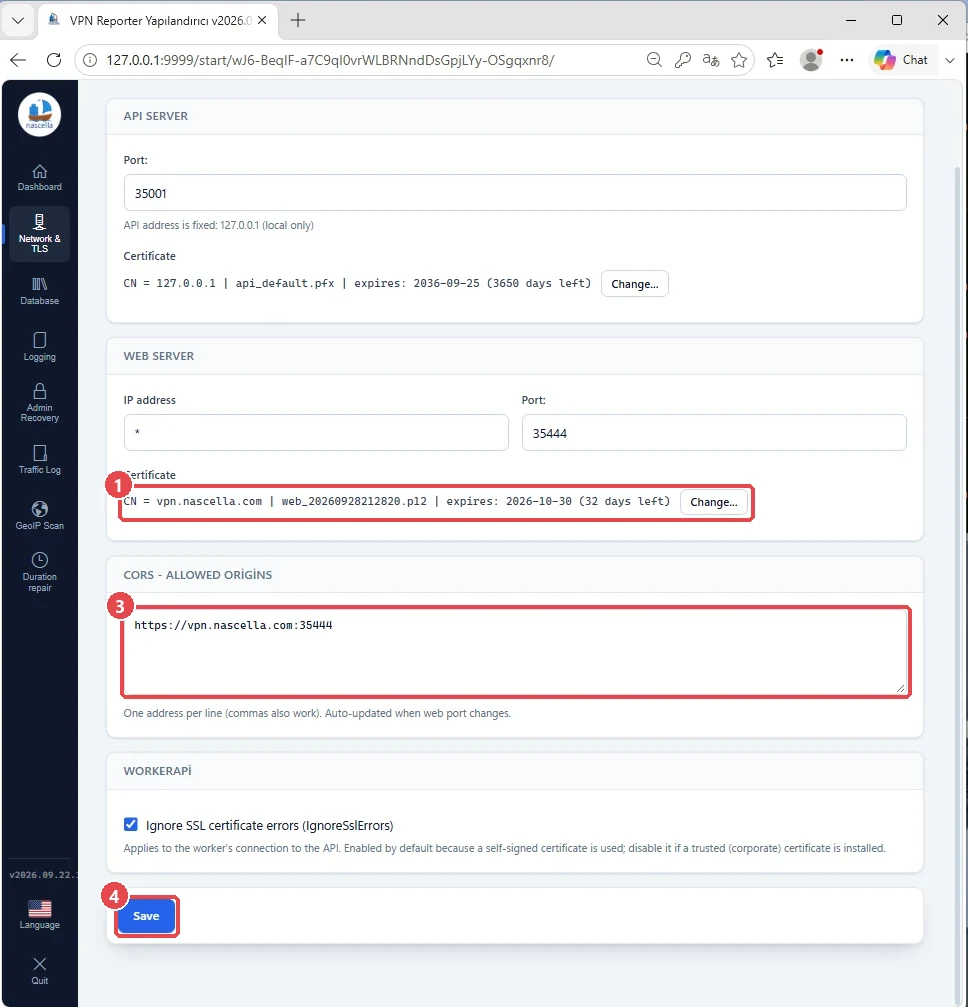
In the Web Server section, click Change… next to the certificate line.
-
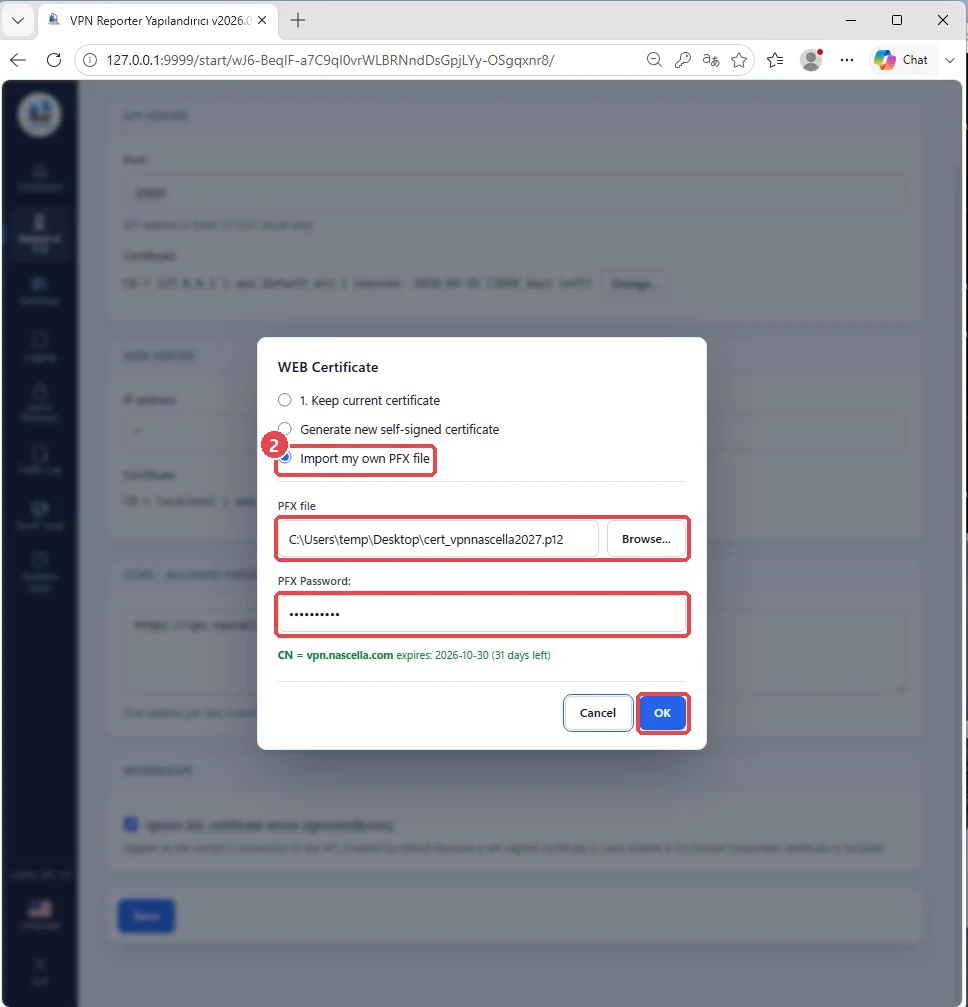
In the window that opens, choose Import my own PFX file, select the PFX file and enter its password. The certificate name (CN) and expiry date are shown; if they are correct, click OK. The other options are Keep current certificate and Generate new self-signed certificate.
-
In CORS - Allowed Origins, enter the secure address you will use to reach the web console, for example
https://vpn.nascella.com:35444. The name must match the name in the certificate. -
Click Save.
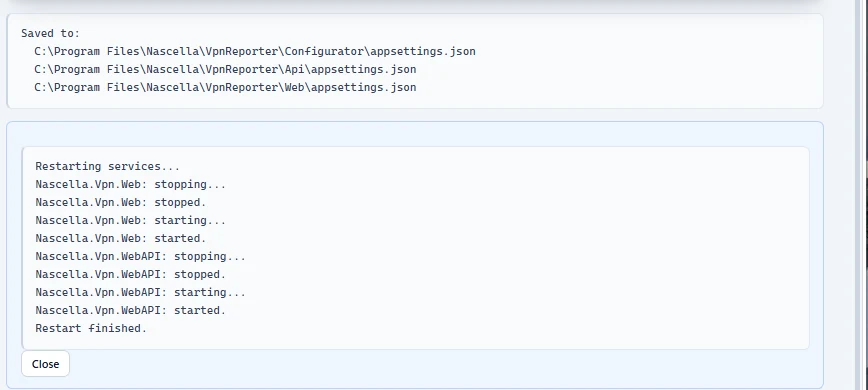
After saving you are asked whether to restart the services; click Yes. The services are stopped and started in turn.
The days left are shown on this screen and in the Certificates section of the Dashboard. Import the new certificate the same way before the current one expires.
4. Dashboard and services
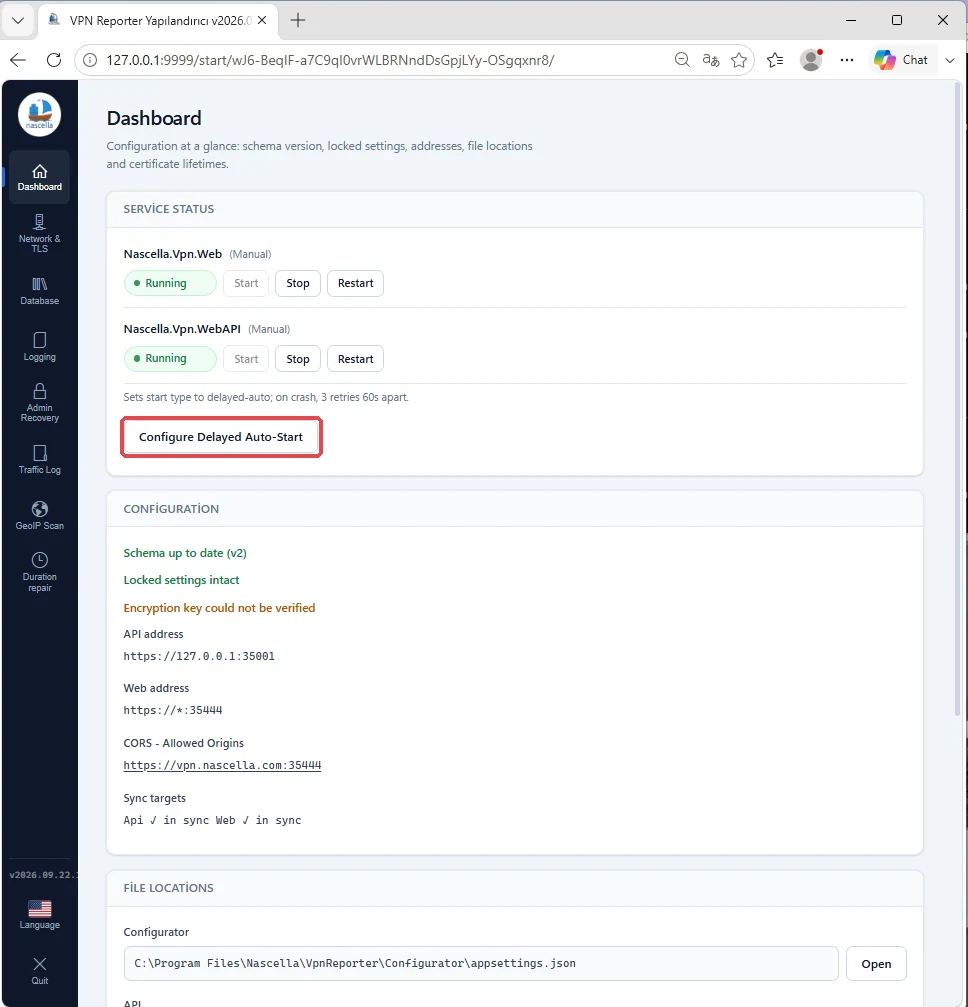
The Configurator's Dashboard shows the service status (Start / Stop / Restart), the API and web addresses and the CORS addresses. Click a CORS address to open the web console.
Click Configure Delayed Auto-Start. The setup creates the services with manual start; this button makes them start automatically (delayed) when Windows starts and sets 3 restart attempts, 60 seconds apart, if a service fails.
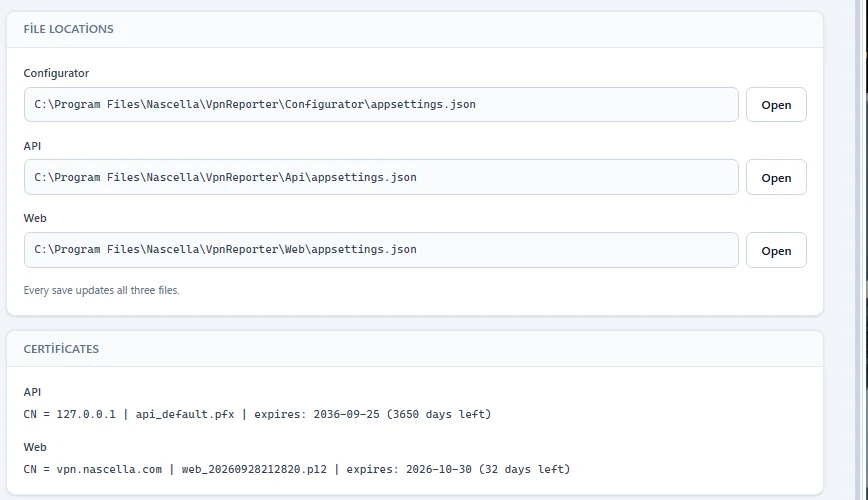
The lower part of the page shows the configuration file locations (every save updates all three files) and the expiry dates of the API and web certificates.
Other settings
These screens are not needed for the first setup.
Logging
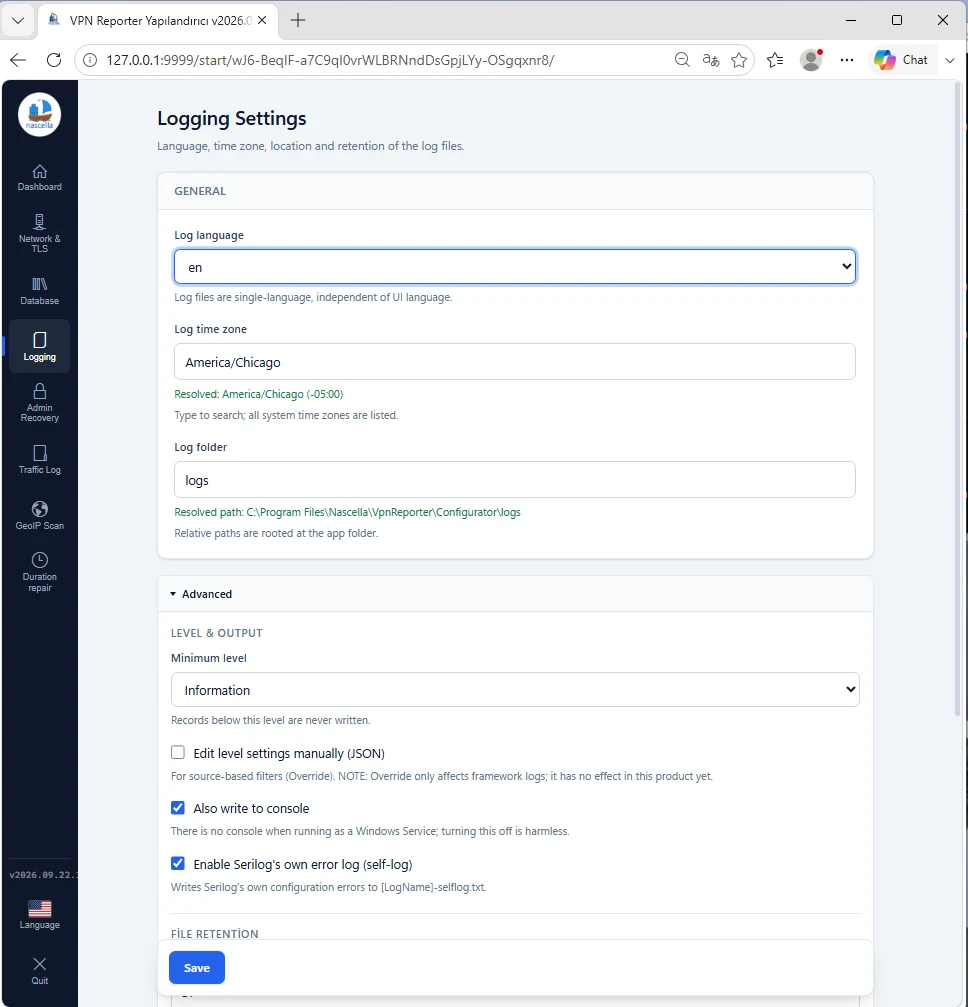
| Setting | Description |
|---|---|
| Log language | Language of the log files. Independent of the interface language; files are written in a single language. |
| Log time zone | Time zone of the timestamps in the logs. |
| Log folder | A relative path is resolved against the application folder. |
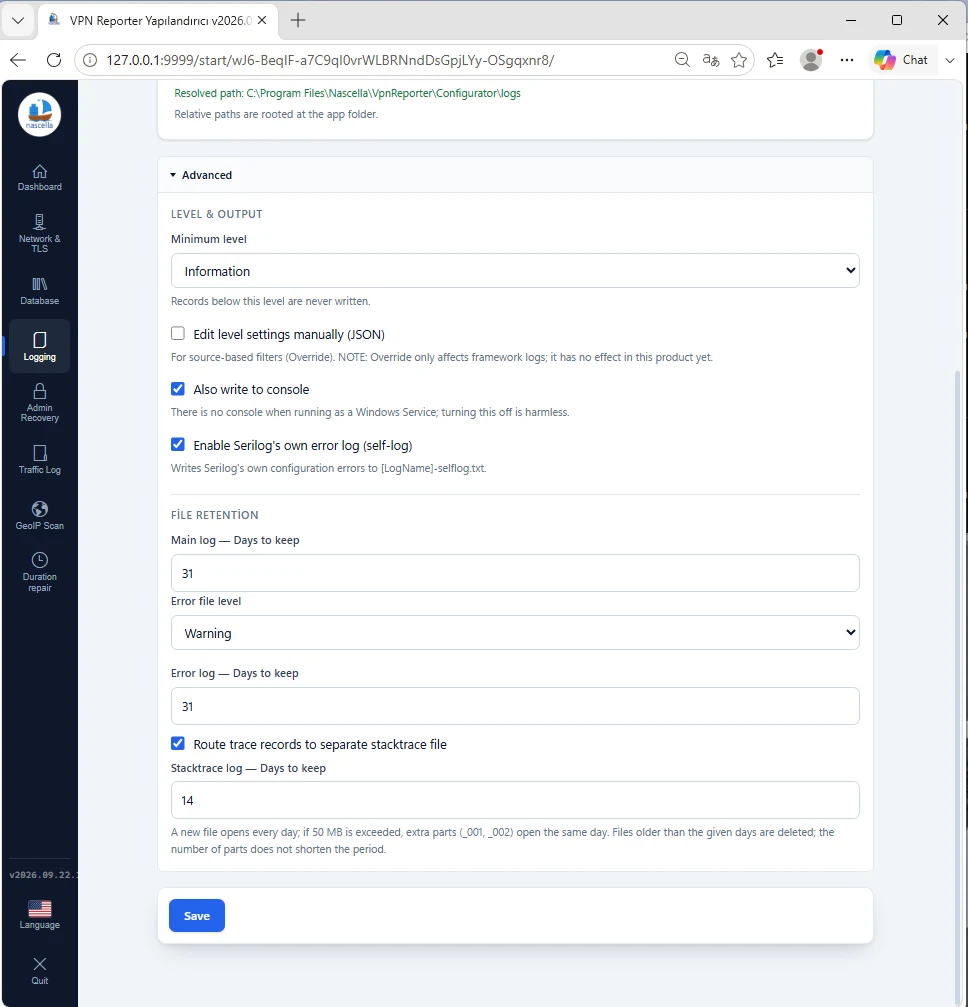
| Minimum level | Records below this level are not written (default Information). |
| Retention | Main and error logs 31 days, stack-trace log 14 days (defaults). A new file starts every day; above 50 MB an extra part is added for the same day. |
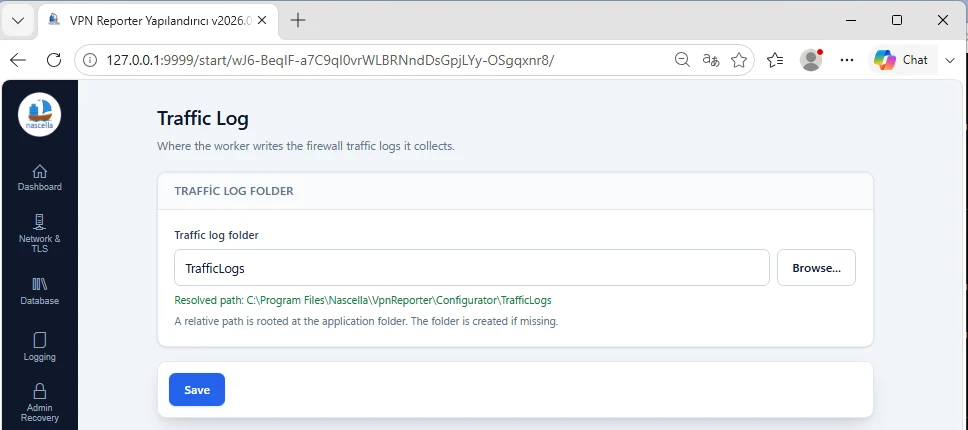
Traffic log
Folder where the traffic logs pulled from the firewall are stored. A relative path is resolved against the application folder; the folder is created if missing.
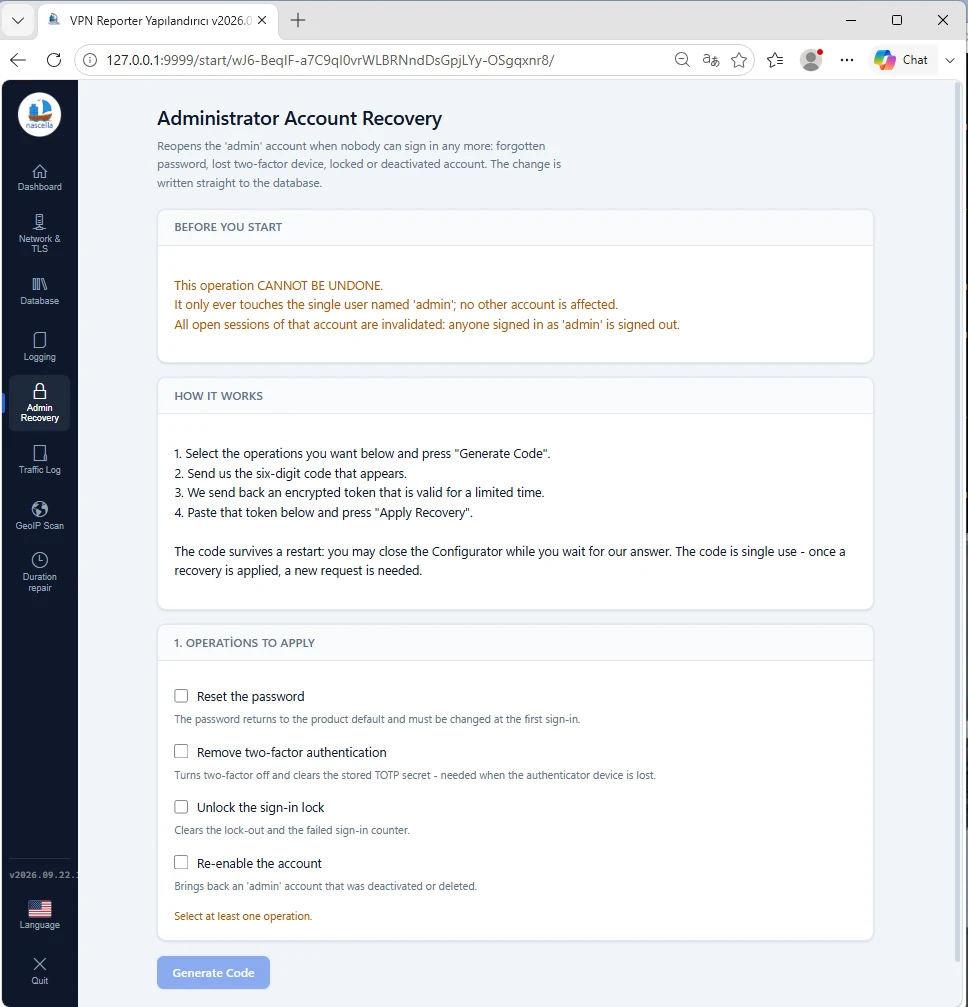
Admin recovery
Reopens the admin account when nobody can sign in: forgotten password, lost two-factor device, locked or deactivated
account. The change is written straight to the database.
It only affects the user named admin; no other account is touched. All open sessions of the admin account are signed out.
- Select the operations to apply:
- Reset the password: the password returns to the product default and must be changed at the first sign-in.
- Remove two-factor authentication: when the authenticator device is lost.
- Unlock the sign-in lock: clears the lock-out and the failed sign-in counter.
- Re-enable the account: brings back an
adminaccount that was deactivated or deleted.
- Click Generate Code and send us the six-digit code.
- Paste the time-limited encrypted token we send back and click Apply Recovery.
The code survives a restart, so you can close the Configurator while waiting for our answer. Each code is single-use.
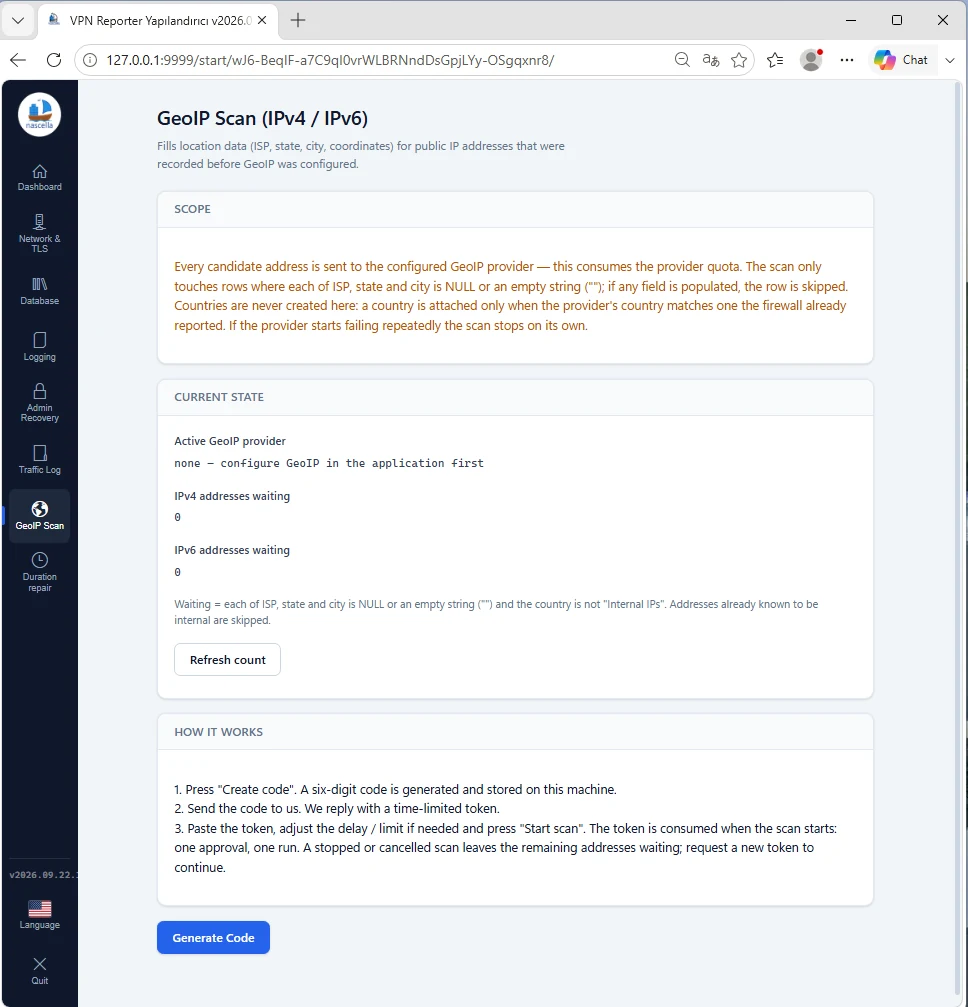
GeoIP scan
Fills in location details (ISP, region, city, coordinates) for public IP addresses saved before GeoIP was configured. The scan uses your GeoIP provider's quota and only touches records where these fields are empty. Nascella approval is required: click Generate Code, send us the code, paste the time-limited token we send back and start the scan. Each token allows one scan.
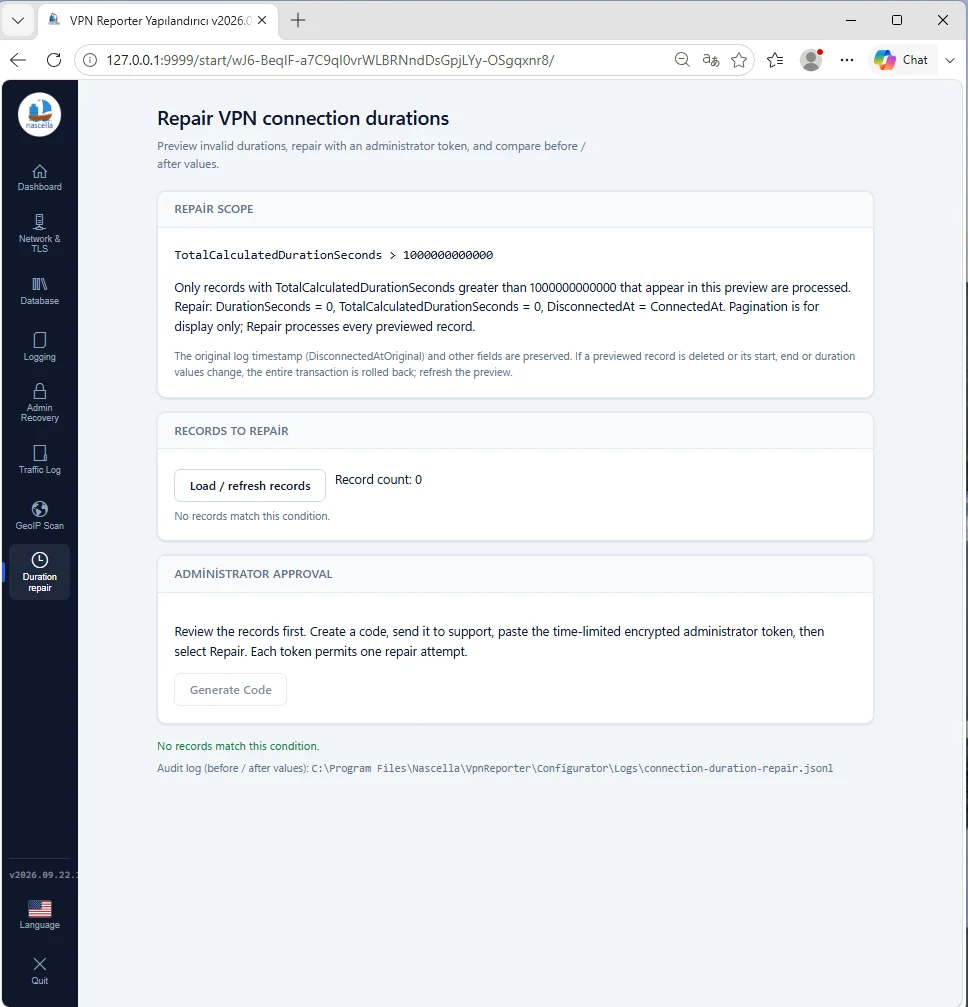
Duration repair
Previews and repairs invalid (abnormally large) connection durations; the values before and after the repair are written to an audit file. An administrator token is required: review the records, generate a code and send it to our support team, paste the token you receive and run the repair. Use it only when our support team asks you to.
Quit
When you are done, click Quit at the bottom left and confirm with Yes. Unsaved changes are lost.
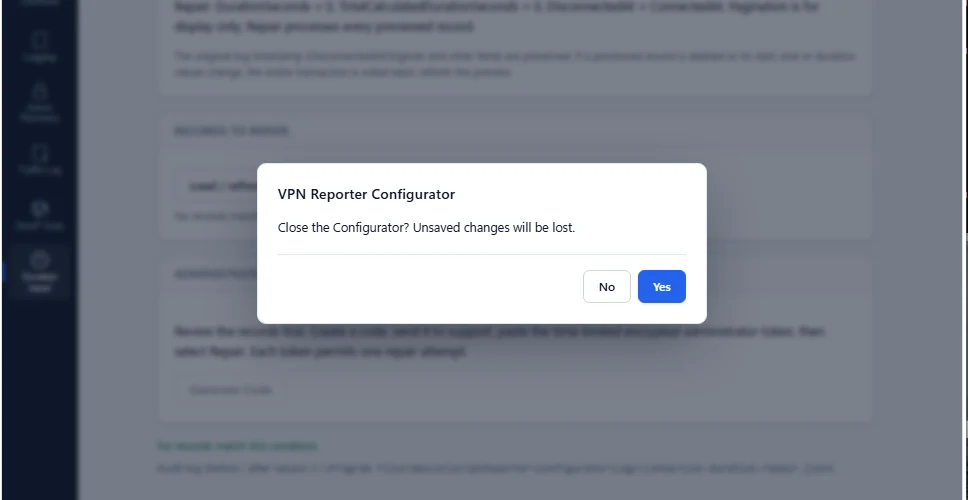
The Configurator closes and the browser tab closes on its own after a few seconds.

Next step: First sign-in to the web console.