User management
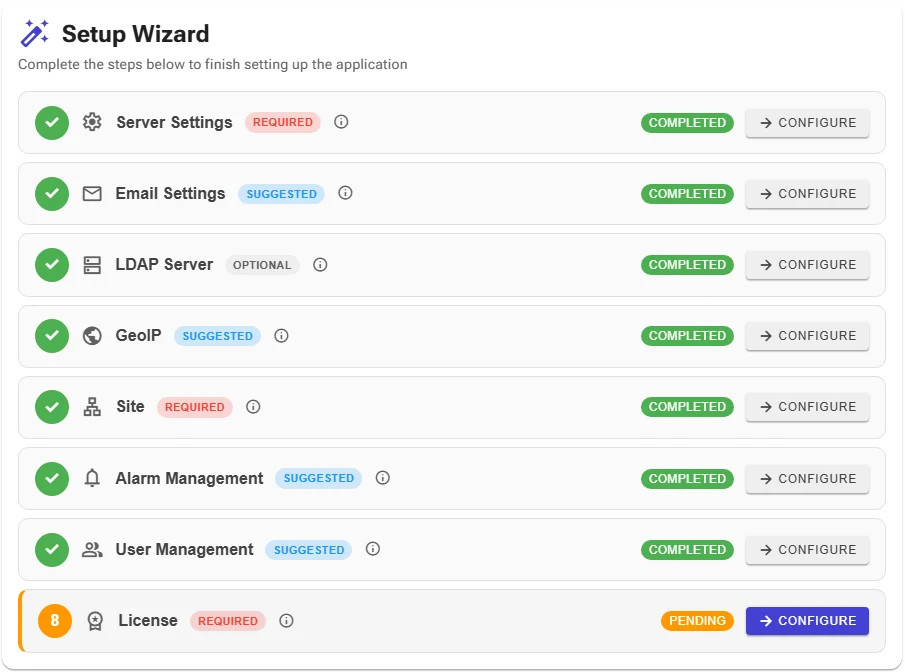
This is step 7 of the setup wizard (suggested). Rather than working with the single admin account, we recommend
adding secondary administrator accounts. For example, if you set up an LDAP server, add the
administrator from Active Directory.

Add a user
-
Click the + button at the top left of the list.
-
Fill in the details:
Field Description LDAP server The user's directory, for example Nascella AD.Username The user name in the directory, for example Administrator.User default Language / User default time zone The user's interface language and time zone. Display name / Email The name and address shown in the interface and notifications. User role One of the roles below. -
Click Save.
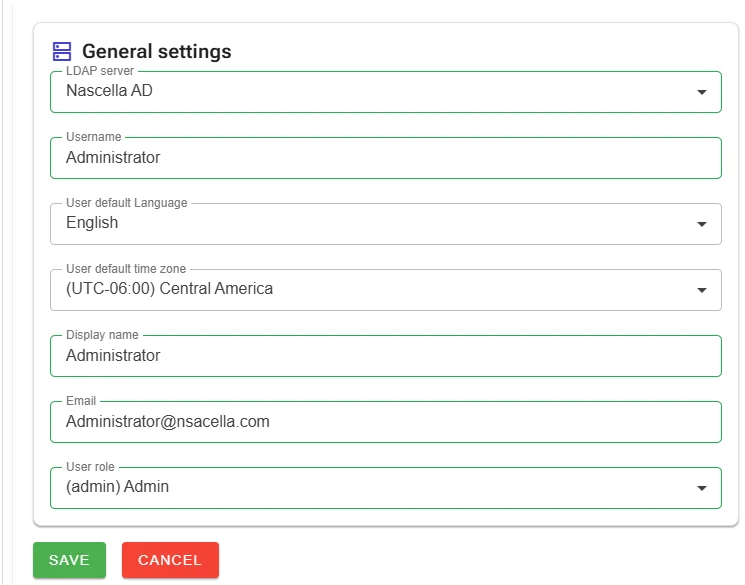
LDAP users have no password here; they sign in with their own directory password.
Roles

| Role | Access |
|---|---|
| Admin | All screens and settings. |
| Read-only admin | Can browse the web console and all data, but cannot change settings. |
| Report Admin User | No access to administration screens; can see VPN data and reports for all accounts. |
| Report Limited User | No access to administration screens and, by default, cannot see any user's data. After creating the account, choose which accounts' data it can see on the Reports → Report Limited User screen. |
When the user is added, a User created successfully notification appears and the list is updated. The list also shows the last sign-in time, failed attempts and lock status.

Next step
Click Continue setup to return to the wizard; the User Management step shows as Completed.
Next step: License and starting the site.