Email settings
This is step 2 of the setup wizard (suggested). Configure it if you want error and report notifications or two-factor authentication by email. Later you can open it from the Setting management menu.
General settings
| Setting | Description |
|---|---|
| Enabled | Turns email delivery on. |
| Default subject | Used for emails without their own subject, for example Nascella Notification. |
| Default recipient | Addresses that receive emails without their own recipients. |
| Provider type | Smtp, Graph (Microsoft 365) or OAuth. The settings below change with the selection. |
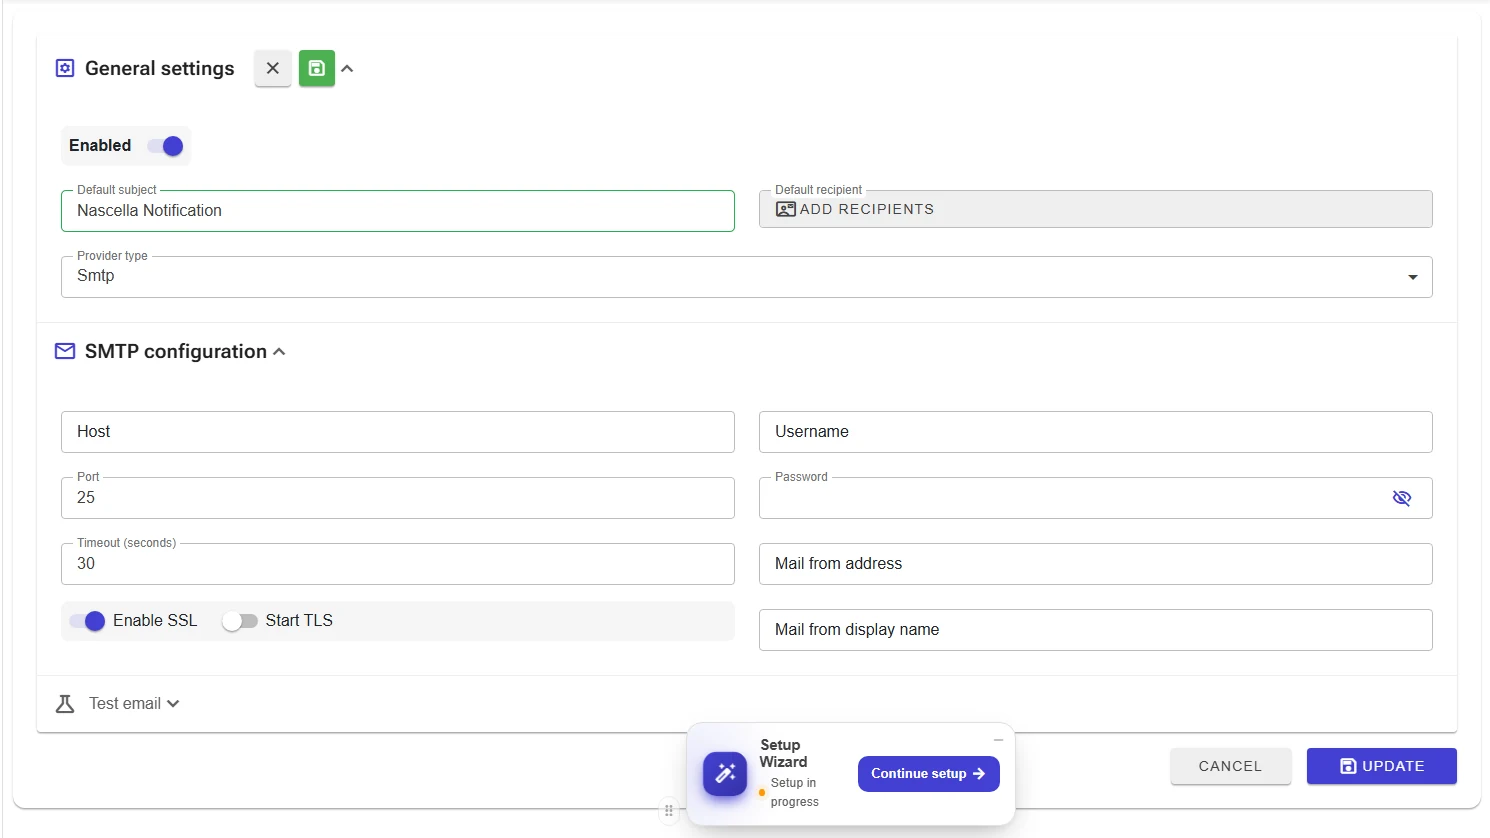
Adding recipients
-
Click the Default recipient field (ADD RECIPIENTS).
-
In the window that opens, type the email address and press Enter or the green + button next to it.

-
Added addresses are listed and selected. You can add several addresses. Click Apply.

Provider settings
SMTP
| Setting | Description |
|---|---|
| Host / Port | Address and port of the SMTP server (default 25). |
| Timeout (seconds) | How long to wait for the server (default 30). |
| Enable SSL / Start TLS | The encrypted connection type your server requires. |
| Username / Password | SMTP credentials. |
| Mail from address | The address emails are sent from. |
| Mail from display name | The sender name recipients see, for example Nascella Technology VPN Reporter. |
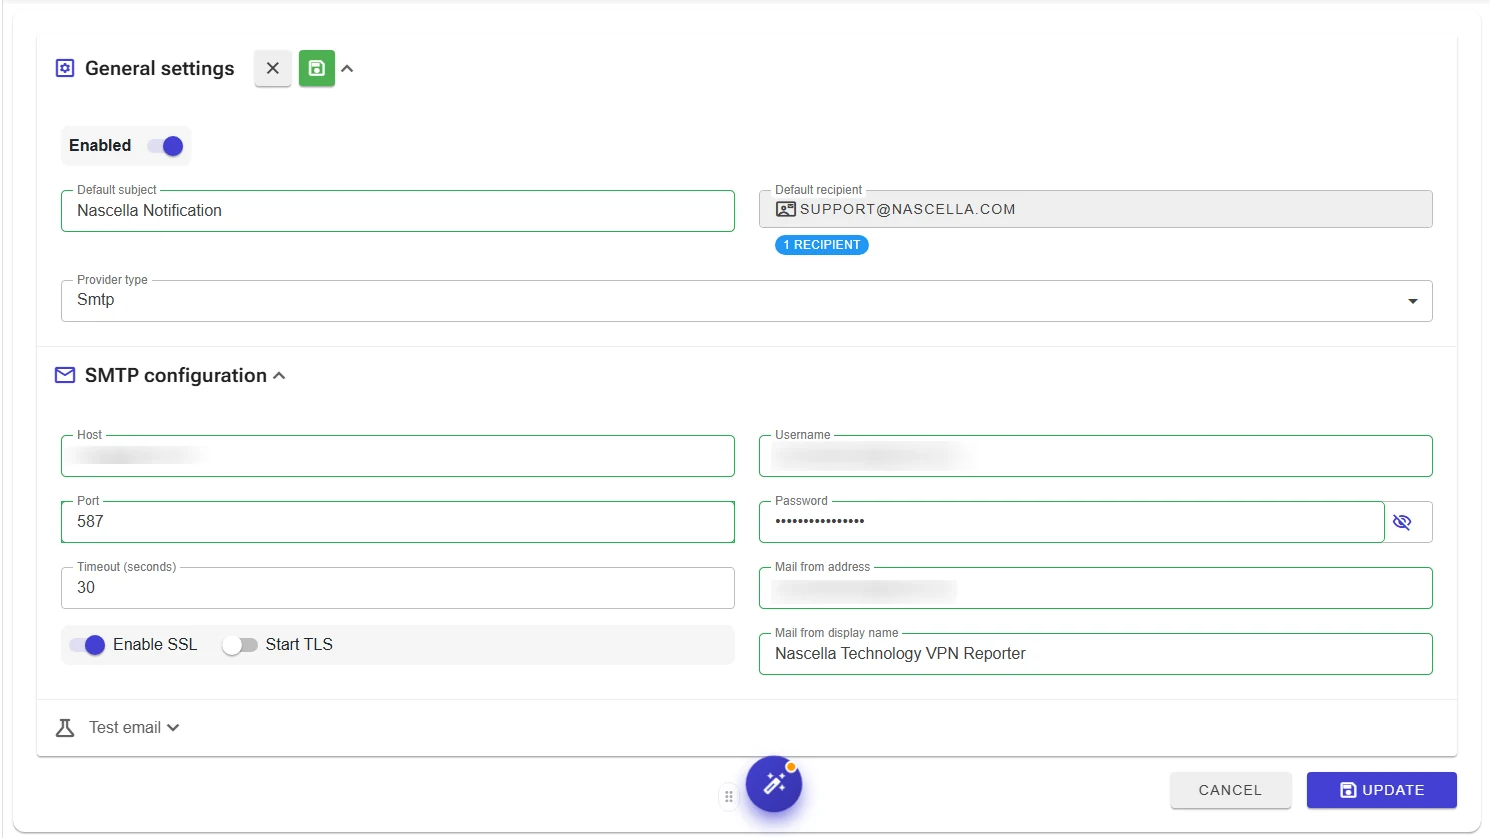
Google accounts require an app password for SMTP instead of the normal password.
Microsoft Graph (Microsoft 365)
Sends from a Microsoft 365 mailbox through the Graph API. Required fields: Tenant ID, Client ID, Client Secret and the sender email address.
Create an app registration in Microsoft Entra ID, grant it the Microsoft Graph Mail.Send application permission and give admin consent.
OAuth
For email providers that support OAuth 2.0. Required fields: Token Endpoint, Client ID, Client Secret, Authorization Endpoint, Redirect URI and the user email address.
Test and save
- Open the Test email section at the bottom, enter an email address and click Send.
- Status should show Success.
- Click Update to save the settings.
The test uses the values currently on the screen, even if they are not saved yet. You can try a change first and save it only when the test succeeds. The same applies to every test area in VPN Reporter (LDAP, GeoIP, site).

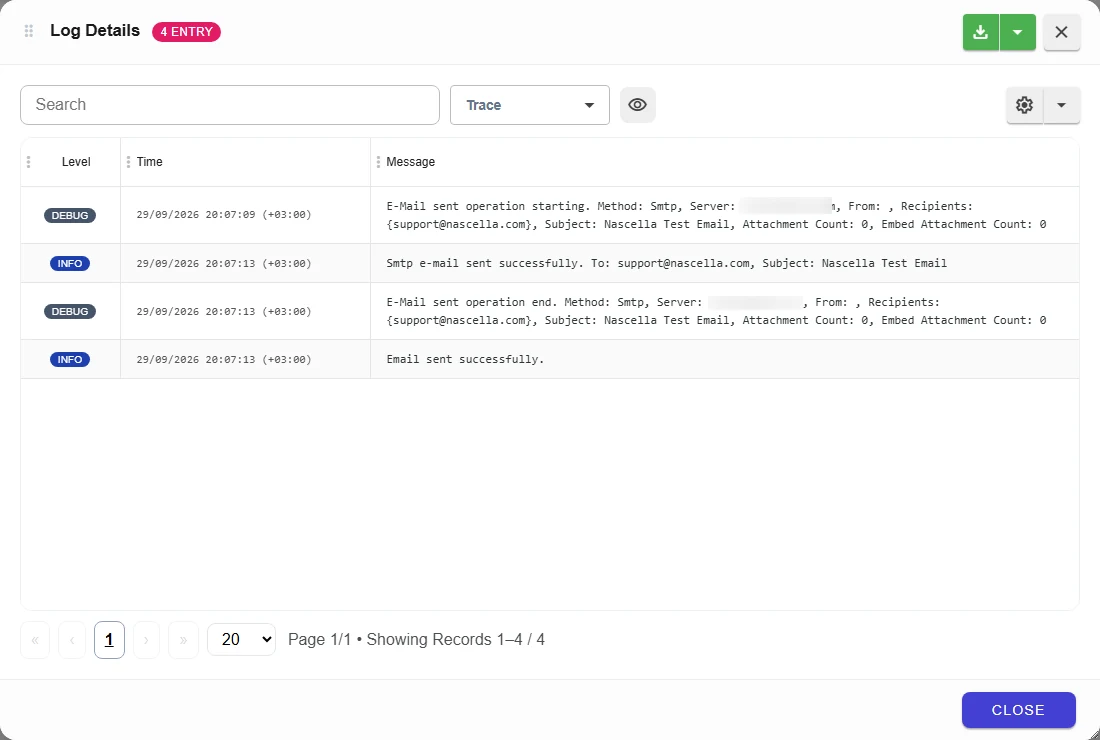
If the test fails, click Show Logs to see detailed logs of the delivery. You can search, filter by level and download the entries.
Next step
Click Continue setup to return to the wizard; the Email Settings step shows as Completed.
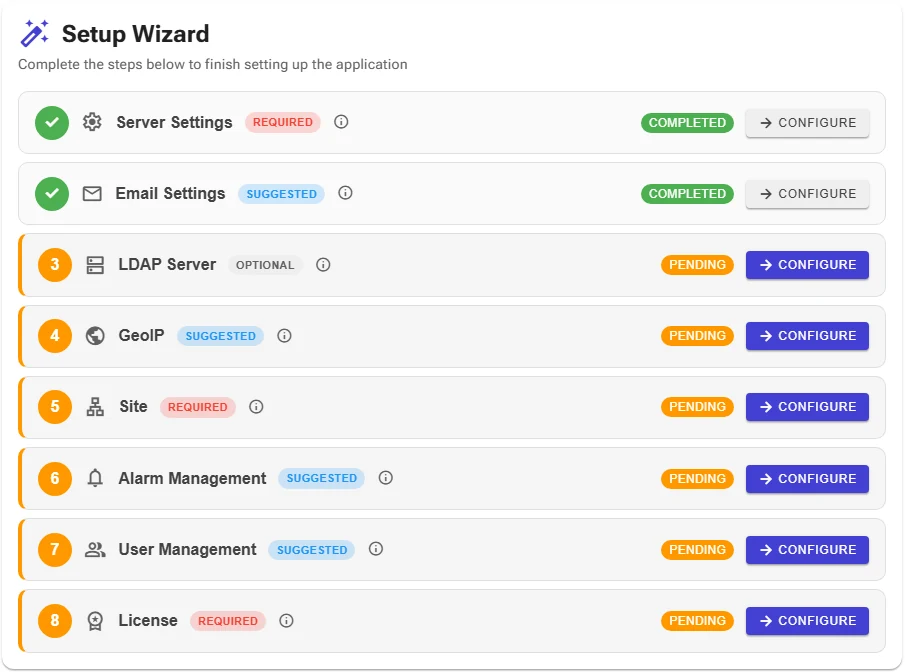
Next step: LDAP server.